
In this article we connect a VEML6075 sensor to a Linkit One.
The VEML6075 is an advanced ultraviolet (UVA / UVB) light sensor with an I2C protocol interface and designed in the CMOS process.
An accurate VEML6075 UVI sensing system requires visible and infrared noise compensation and a teflon diffusor for cosine angular response correction. The UVI formulas and related UVI formula coefficients are discussed here in detail. The coefficient extraction method and a calculated example are also presented in this application note.
The VEML6075 is easily operated via a simple I2C command. It incorporates a photodiode, amplifiers, and analog / digital circuits into a single chip. The VEML6075’s adoption of FiltronTM UV technology provides the best spectral sensitivity to cover UVA and UVB spectrum sensing. It has excellent temperature compensation and a robust refresh rate setting without the need for an external RC low-pass filter.
The VEML6075 shows linear sensitivity to solar UVA as well as UVB light and its sensitivity can easily be adjusted with selecting the proper integration times. The device can be used as a solar UV indicator for cosmetic / outdoor sport handheld products or any kind of consumer products.
The VEML6075 operates within a supply voltage range from 1.7 V to 3.6 V. The necessary pull-up resistors at the I2C line can be connected to the same supply as the micro controller is connected to, between 1.7 V and 3.6 V.
Parts List
| Amount | Part Type |
|---|---|
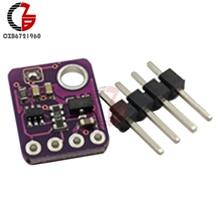
| 1 | VEML6075 |
| 1 | I2C Interface 3.3V Board Based on VEML6075 UVA UVB Light Sensor Module |
Schematics/Layout
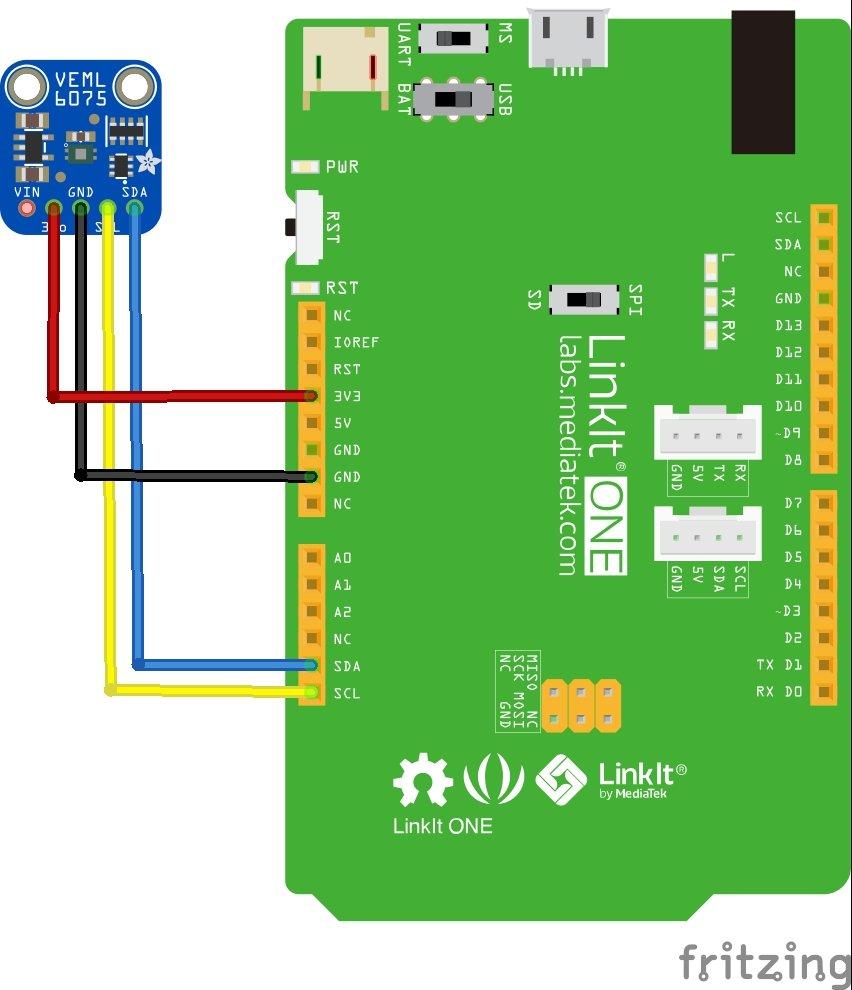
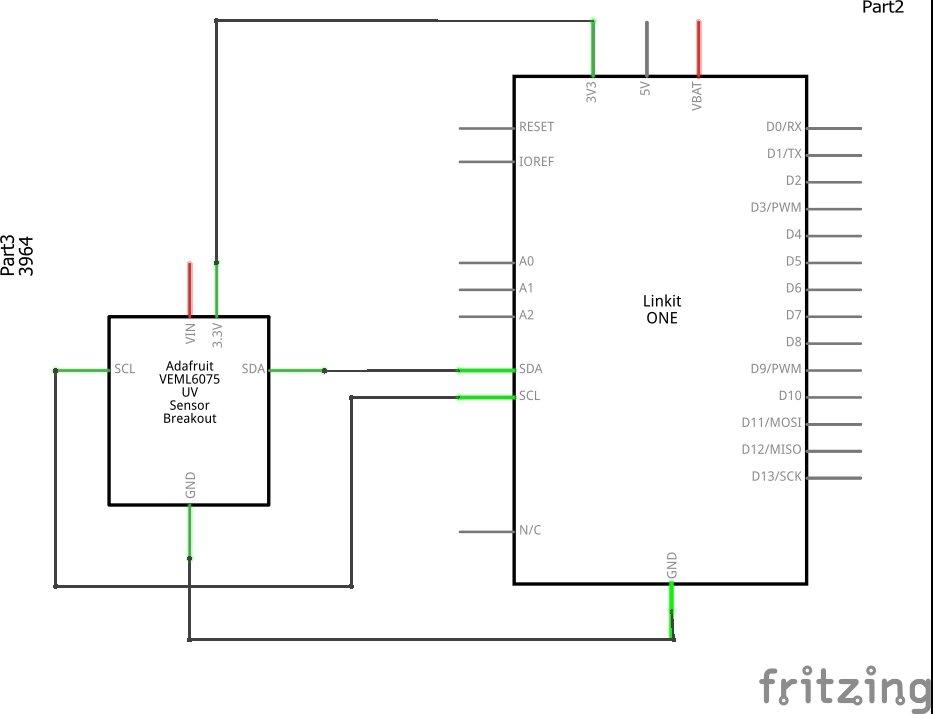
Here is how to connect the sensor to the LinkIt one
Test Code
Again we use a library – https://github.com/NorthernWidget/VEML6075
[codesyntax lang=”cpp”]
#include <VEML6075.h>

VEML6075 UV;

void setup()
{
Serial.begin(38400); //Begin Serial
UV.begin(); //Begin the UV module

}

void loop()
{
Serial.print("UVA = ");
Serial.print(UV.GetUVA()); //Get compensated UVA value
Serial.print(" UVB = ");
Serial.println(UV.GetUVB()); //Get compensated UVB value
delay(1000);
}
[/codesyntax]
Test Output
Open the serial monitor – this is what I saw but I tested this indoors
UVA = 0.00 UVB = 3.00
UVA = 0.00 UVB = 0.00
UVA = 0.00 UVB = 0.00
UVA = 0.00 UVB = 2.00
UVA = 0.00 UVB = 2.00
UVA = 0.00 UVB = 2.00
Other Code Example
This one uses the Adafruit library
[codesyntax lang=”cpp”]
#include <Wire.h>
#include "Adafruit_VEML6075.h"

Adafruit_VEML6075 uv = Adafruit_VEML6075();

void setup()
{
  Serial.begin(115200);
  Serial.println("VEML6075 Simple Test");
  if (! uv.begin())
  {
    Serial.println("Failed to communicate with VEML6075 sensor, check wiring?");
  }
  Serial.println("Found VEML6075 sensor");
}


void loop()
{
  Serial.print("UV Index reading: ");
  Serial.println(uv.readUVI());
  delay(1000);
}
[/codesyntax]
I saw some negative readings using the Adafruit libraries, although I tested this indoors
Links
https://www.vishay.com/docs/84339/designingveml6075.pdf
https://www.vishay.com/docs/84304/veml6075.pdf
