
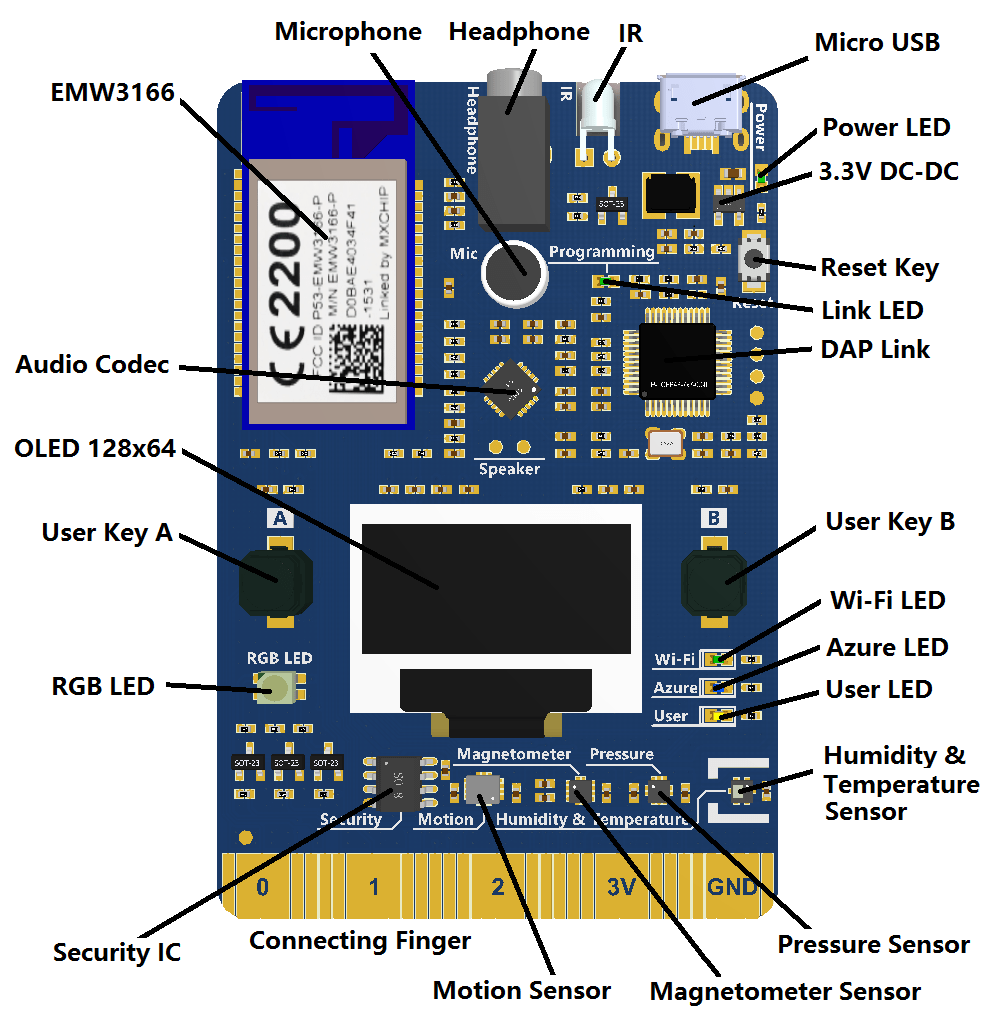
In this article we look at another couple of features of the mxchip iot devkit, the RGB LED and the 128x 64 OLED display
You can see these on the image of the board below
Parts
About $41 for the board
seeed studio MXChip AZ3166 IOT Developer Kit Compatible with Arduino
Code
This is for the Arduino IDE once you have added support for the MXChip
This is an OLED display example
[codesyntax lang=”cpp”]
#include <OledDisplay.h>

void setup(){
    Screen.init();
}
void loop(){
    // print a string to the screen with wrapped = false
    Screen.print("This is OLEDDisplay Testing", false);
    delay(1000);
    // print a string to the screen with wrapped = true
    Screen.print("long string; \nlong string;\nlong string;\nlong string;", true);
    delay(1000);
    for(int i =0; i<=3; i++)
    {
        char buf[100];
        sprintf(buf, "This is row %d", i);
        Screen.print(i, buf);
    }
    delay(1000);
    // clean screen ready for next loop
    Screen.clean();
}
[/codesyntax]
Now for the second example, this is for the RGB LED
[codesyntax lang=”cpp”]
#include "RGB_LED.h"

RGB_LED rgbLed;

uint8_t color[][3] = {
        {255, 0, 0},                // red
        {0, 255, 0},                // green
        {0, 0, 255},                // blue
        {0, 0, 0},
        {255, 255, 0},
        {0, 255, 255},
        {255, 0, 255},
        {255, 255, 255}
    };
void setup()
{
}

void loop()
{
    for(int i = 0; i< 8; ++i)
    {
        Serial.printf("Red: %d, Green: %d, Blue: %d\n", color[i][0], color[i][1], color[i][2]);
        rgbLed.setColor(color[i][0], color[i][1], color[i][2]);
        delay(1000);
    }
    Serial.println("Turn off");
    rgbLed.turnOff();
    delay(1000);
}
[/codesyntax]
