
In this article we will connect a CCS811 gas sensor to a Linkit One and we will create an example using the Arduino IDE to display the values via web page and also a version which displays values on a web page
CCS811 is a low-power digital gas sensor solution, which integrates a gas sensor solution for detecting low levels of VOCs typically found indoors, with a microcontroller unit (MCU) and an Analog-to-Digital converter to monitor the local environment and provide an indication of the indoor air quality via an equivalent CO2 or TVOC output over a standard I2C digital interface.
Features
Integrated MCU
On-board processing
Standard digital interface
Optimised low power modes
IAQ threshold alarms
Programmable baseline
2.7mm x 4.0mm LGA package
Low component count
Proven technology platform
Specs
| Interface | I²C |
|---|---|
| Supply Voltage [V] | 1.8 to 3.6 |
| Power Consumption [mW] | 1.2 to 46 |
| Dimension [mm] | 2.7 x 4.0 x 1.1 LGA |
| Ambient Temperature Range [°C] | -40 to 85 |
| Ambient Humidity Range [% r.h.] | 10 to 95 |
Parts List
| Amount | Part Type |
|---|---|
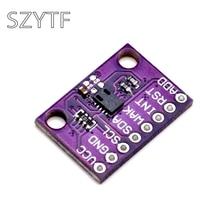
| 1 | CJMCU-811 CCS811 Air Quality Gas Sensor |
| 1 | LinkIt ONE MT2502A wireless 2503 development board |
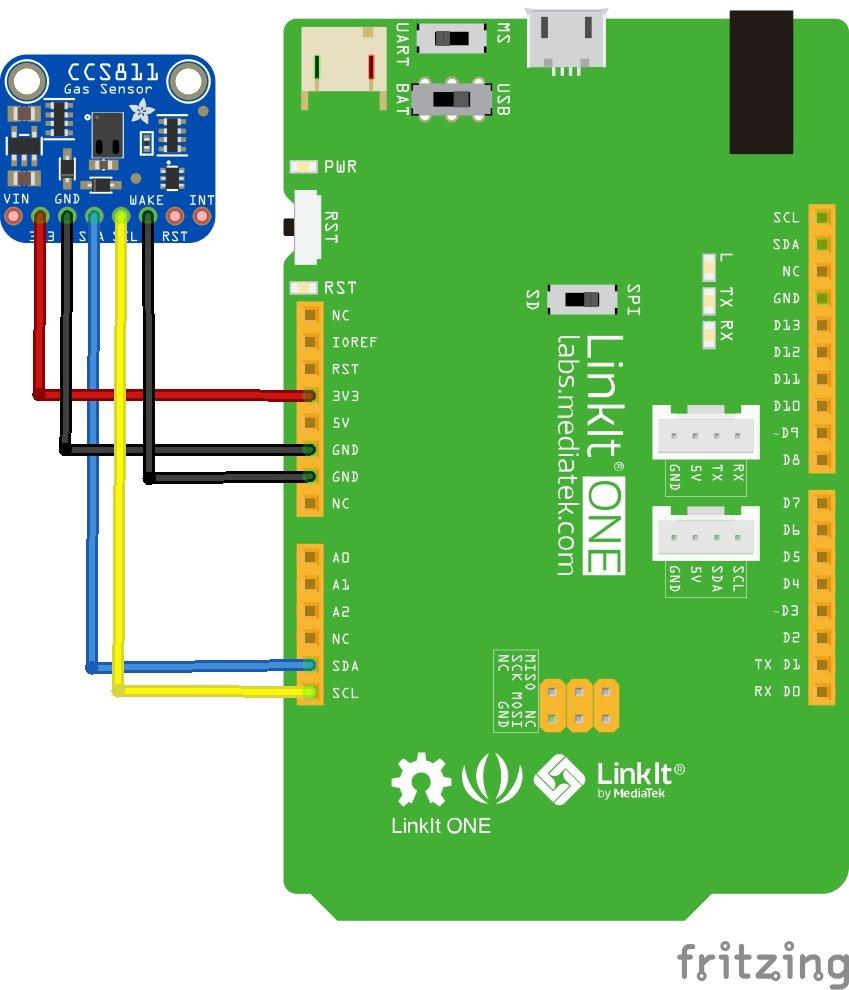
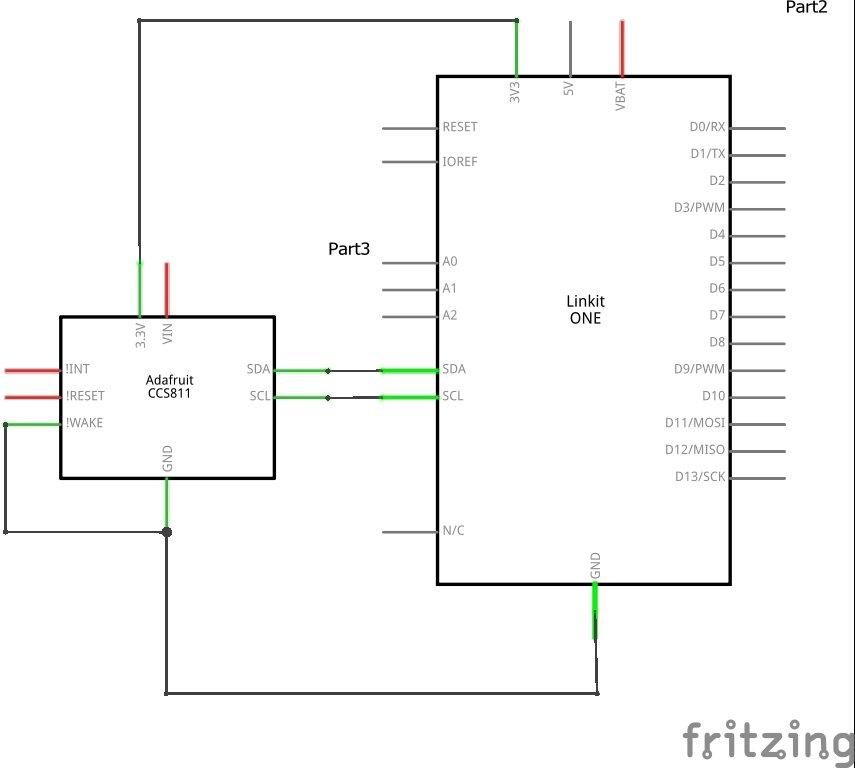
Schematics/Layout
Remember and connect WAKE to gnd
Code
Again we use a library – the adafruit CCS811 one, you can add this in the library manager
And this is the out of the box example
[codesyntax lang=”cpp”]
#include "Adafruit_CCS811.h"

Adafruit_CCS811 ccs;

void setup()
{
Serial.begin(9600);
Serial.println("CCS811 test");

if(!ccs.begin())
{
  Serial.println("Failed to start sensor! Please check your wiring.");
  while(1);
  }
  //calibrate temperature sensor
  while(!ccs.available());
  float temp = ccs.calculateTemperature();
  ccs.setTempOffset(temp - 25.0);
}

void loop()
{
  if(ccs.available())
  {
    float temp = ccs.calculateTemperature();
    if(!ccs.readData())
    {
      Serial.print("CO2: ");
      Serial.print(ccs.geteCO2());
      Serial.print("ppm, TVOC: ");
      Serial.print(ccs.getTVOC());
      Serial.print("ppb Temp:");
      Serial.println(temp);
    }
    else
    {
      Serial.println("ERROR!");
      while(1);
    }
  }
  delay(500);
}
[/codesyntax]
Output
Open the serial monitor – this is what I saw. The higher CO2 level was when I breathed on the sensor
CO2: 400ppm, TVOC: 0ppb Temp:24.25
CO2: 400ppm, TVOC: 0ppb Temp:25.00
CO2: 400ppm, TVOC: 0ppb Temp:25.38
CO2: 1012ppm, TVOC: 93ppb Temp:25.38
CO2: 424ppm, TVOC: 3ppb Temp:25.00
CO2: 400ppm, TVOC: 0ppb Temp:25.38
CO2: 400ppm, TVOC: 0ppb Temp:24.25
CO2: 400ppm, TVOC: 0ppb Temp:13.68
WIFI Example
There are 3 lines that will/may need changed for your Wifi details
#define WIFI_AP "wifi ssid here"
#define WIFI_PASSWORD "password here"
#define WIFI_AUTH LWIFI_WPA

The last one you can select from from LWIFI_OPEN, LWIFI_WPA, or LWIFI_WEP according to your WiFi AP configuration
[codesyntax lang=”cpp”]
#include <LTask.h>
#include <LWiFi.h>
#include <LWiFiServer.h>
#include <LWiFiClient.h>
#include "Adafruit_CCS811.h"

#define WIFI_AP "wifi ssid here"
#define WIFI_PASSWORD "password here"
#define WIFI_AUTH LWIFI_WPA

Adafruit_CCS811 ccs;
LWiFiServer server(80);


void setup()
{
    LTask.begin();
    LWiFi.begin();
    Serial.begin(9600);

    if(!ccs.begin())
    {
      Serial.println("Failed to start sensor! Please check your wiring.");
      //calibrate temperature sensor
      while(!ccs.available());
      float temp = ccs.calculateTemperature();
      ccs.setTempOffset(temp - 25.0);
    }

    // keep retrying until connected to AP
    Serial.println("Connecting to AP");
    while (0 == LWiFi.connect(WIFI_AP, LWiFiLoginInfo(WIFI_AUTH, WIFI_PASSWORD)))
    {
        delay(1000);
    }

    printWifiStatus();

    Serial.println("Start Server");
    server.begin();
    Serial.println("Server Started");
}

int loopCount = 0;

void loop()
{
    // put your main code here, to run repeatedly:
    delay(500);
    loopCount++;
    LWiFiClient client = server.available();


    if (client)
    {
        Serial.println("new client");
        // an http request ends with a blank line
        boolean currentLineIsBlank = true;

        unsigned long timer_out = millis();

        while (client.connected())
        {

            if(millis()-timer_out > 5000)break;

            if (client.available())
            {
                // we basically ignores client request, but wait for HTTP request end
                int c = client.read();
                Serial.print((char)c);

                if (c == '\n' && currentLineIsBlank)
                {
                    Serial.println("send response");
                    // send a standard http response header
                    client.println("HTTP/1.1 200 OK");
                    client.println("Content-Type: text/html");
                    client.println("Connection: close");  // the connection will be closed after completion of the response
                    client.println("Refresh: 5");  // refresh the page automatically every 5 sec
                    client.println();
                    client.println("<!DOCTYPE HTML>");
                    client.println("<html>");
                    // output the value of each analog input pin

                    if(ccs.available())
                    {
                      float temp = ccs.calculateTemperature();
                      if(!ccs.readData())
                      {
                        client.print("CO2: ");
                        client.print(ccs.geteCO2());
                        client.print("ppm, TVOC: ");
                        client.print(ccs.getTVOC());
                        client.print("ppb Temp:");
                        client.println(temp);
                      }
                      else
                      {
                        client.println("ERROR!");
                        while(1);
                      }
                    }
                    break;
                }
                if (c == '\n')
                {
                    // you're starting a new line
                    currentLineIsBlank = true;
                }
                else if (c != '\r')
                {
                    // you've gotten a character on the current line
                    currentLineIsBlank = false;
                }
            }
        }
        // give the web browser time to receive the data
        delay(500);

        // close the connection:
        Serial.println("close connection");
        client.stop();
        Serial.println("client disconnected");
    }
}

void printWifiStatus()
{
    // print the SSID of the network you're attached to:
    Serial.print("SSID: ");
    Serial.println(LWiFi.SSID());

    // print your WiFi shield's IP address:
    IPAddress ip = LWiFi.localIP();
    Serial.println("Please open your browser, and input the following address:");
    Serial.println(ip);

    Serial.print("\r\nsubnet mask: ");
    Serial.println(LWiFi.subnetMask());

    Serial.print("gateway IP: ");
    Serial.println(LWiFi.gatewayIP());

    // print the received signal strength:
    long rssi = LWiFi.RSSI();
    Serial.print("signal strength (RSSI):");
    Serial.print(rssi);
    Serial.println(" dBm");
}
[/codesyntax]
This example has test code to help you out – the printWifiStatus function, open up the USB Modem Port – not the programming port. You should see a message like this
Connecting to AP
SSID: your ssid here
Please open your browser, and input the following address:
192.168.1.15
Now open the IP address above using your favourite web browser and you should see something like this
CO2: 564ppm, TVOC: 24ppb Temp:91.23
Links
CJMCU-811 CCS811 Air Quality Gas Sensor
