
Ubuntu is a very popular linux distro and I was pleased to see that there was a version available that was suitable for the Raspberry PI, so as a change instead of the usual Raspbian installation I thought that I would try this out.
What follows is a quick and simple guide to downloading, burning and getting yourself up and running with Ubuntu Mate.
Support
Raspberry Pi 2 Model B – this hardware only supports 32 bit
Raspberry Pi 3 Model B
Raspberry Pi 3 Model B+
Raspberry Pi 4
You will need a microSD card which is 8GB or greater to fit the image.
1. Download the Ubuntu MATE image
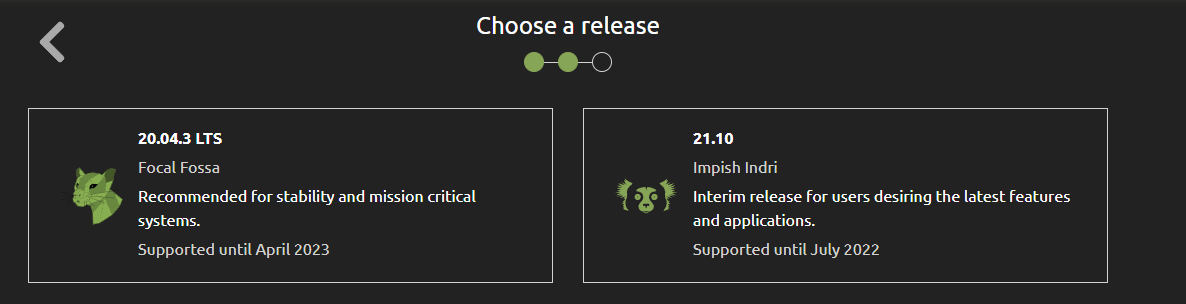
Open your web browser and navigate to https://ubuntu-mate.org/download/
Click the 32 or 64 bit for Raspberry Pi

Click on the option you would like to download
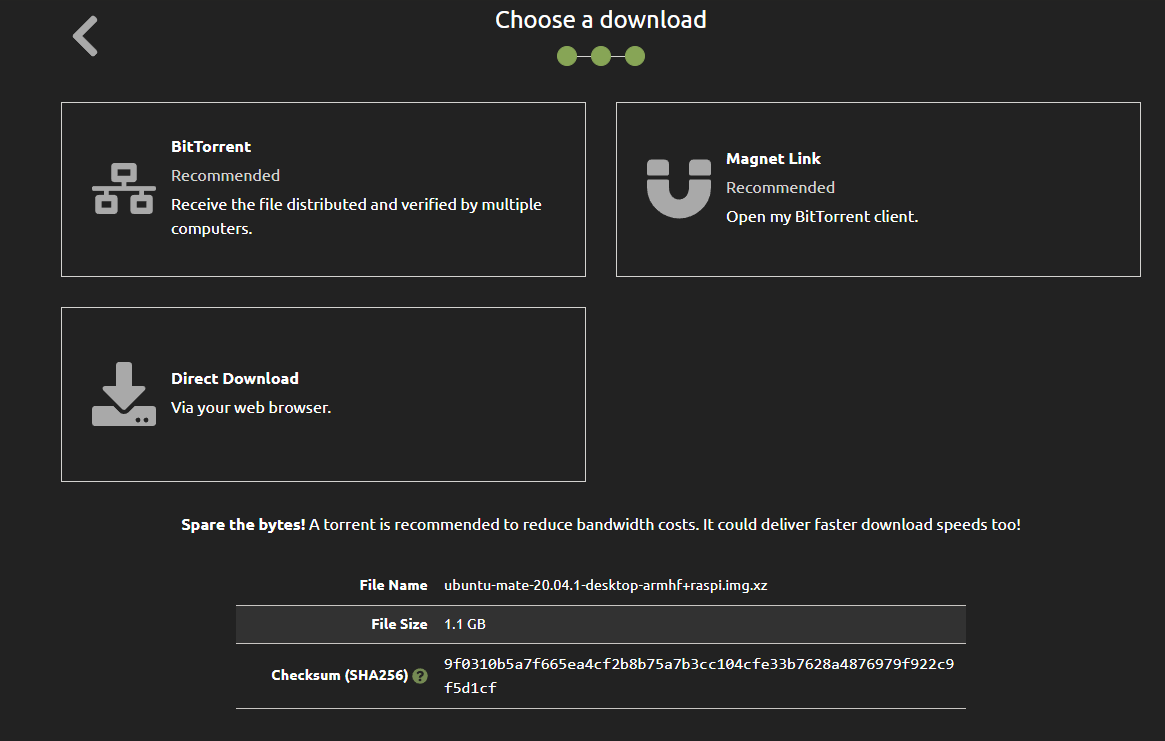
You can then select either a torrent or a direct download. The direct download is 1.2Gb.
2. Extract the Ubuntu image
You’ll need a decompression utility like 7-Zip for Windows 10 to extract the .img file from the downloaded
3. Format the SD card (Windows 10)
Insert your SD card into the slot on your computer if you have one or a card reader
Windows will now inform you that you need to format the disk. Click ‘Format Disk’. Next, you can choose the format which should be FAT32, file system, allocation unit size and volume label.
Windows will warn you that formatting will erase all previous data on the SD card. You want to do this so Choose ‘Ok’ to continue. The device will then be formatted.
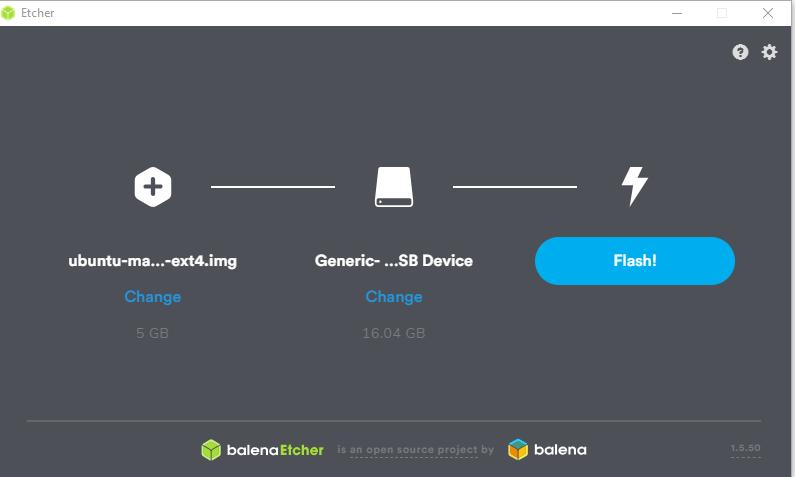
4. Download and install Etcher or W32diskimager
In this example we will use Etcher but for Windows 10 W32diskimager is a good solid option as well
- Run Etcher and select the unzipped Ubuntu image file
- Select the SD card drive
- Finally, click Burn to write the Ubuntu image to the SD card
- You’ll see a progress bar. Once complete, the utility will automatically unmount the SD card so it’s safe to remove it from your computer.
5. Set up Ubuntu MATE
Take your micro sd card from the step above and fit it to your Raspberry Pi, attach a keyboard and mouse for the setup procedure. Apply power and an HDMI cable to a monitor of your choice
Ubuntu MATE setup will now launch. These setup screens are easy to follow and involve selecting the language, timezone, wireless connection.
Next, Ubuntu MATE will ask you to set a username and password. You can also set autologon if you want
The first time you boot the Ubuntu MATE image it will run through a setup wizard where you can create your own user account and configure your regional settings.
The first boot setup takes a few minutes to complete, but subsequent boots are much quicker.
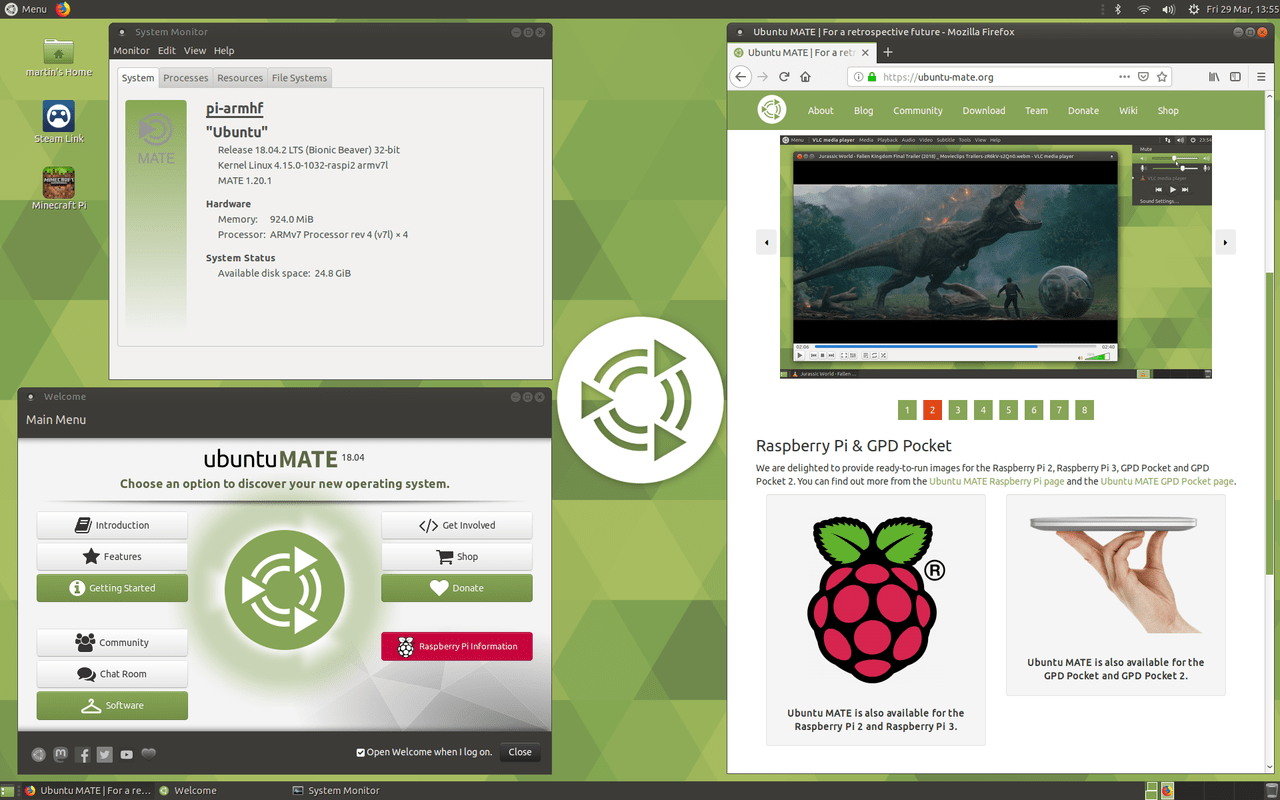
Take time to investigate everything that is available in this fantastic operating system. We will be looking through the OS at a later date but we noticed that many of your favorite programs are installed by default
I thought I would shows some of the features that are listed on the Ubuntu site
- Ubuntu kernel, fully maintained by the Ubuntu Kernel and Security teams.
- Automatic online filesystem expansion.
- Ethernet & WiFi (where available)
- Bluetooth (where available)
- Audio out via 3.5mm analog audio jack or HDMI
- Video out via Composite or HDMI
- GPIO access via GPIO Zero, pigpio and WiringPi.
- Support for Python Wheels for the Raspberry Pi.
- Support for USB Booting.
- Hardware acceleration:
- fbturbo driver is pre-installed but limited to 2D accelerated window moving/scrolling on Raspberry Pi (using theBCM2835 DMA Controller).
- VLC has hardware assisted video decoding.
- ffmpeg has hardware assisted video decoding and encoding.
- The experimental VC4 driver can be enabled via raspi-config.
- Please note, the arm64 images do not feature any VideoCore IV hardware acceleration.
- A port of raspi-config for Ubuntu is pre-installed.
- Steam Link is available for install.
- Minecraft: Pi Edition is available for install.
