
In this article we look at an MLX90393 connected to a Beaglebone first of all lets look at the sensor.
The MLX90393 magnetic field sensor can be reprogrammed to different modes and with different settings at run-time. The sensor offers a 16-bit output proportional to the magnetic flux density sensed along the XYZ axes using the Melexis proprietary Triaxis® technology and also offers a temperature output signal. These digital values are available via I2C and SPI, where the MLX90393 is a slave on the bus.
By selecting which axes are to be measured, the raw data can be used as input for further post-processing, such as for joystick applications, rotary knobs, and more complex 3D position sensing applications. Unparallelled performance is achieved with this sensor, which is primarily targeting industrial and consumer applications.
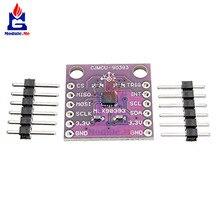
This is the module I used
Parts Required
Schematic/Connection

Code Example
This is a controleverything example – they have code examples for various platforms. This is the C example from https://github.com/ControlEverythingCommunity/MLX90393
[codesyntax lang=”cpp”]
#include <stdio.h>
#include <stdlib.h>
#include <linux/i2c-dev.h>
#include <sys/ioctl.h>
#include <fcntl.h>

void main()
{
	// Create I2C bus
	int file;
	char *bus = "/dev/i2c-2";
	if((file = open(bus, O_RDWR)) < 0)
	{
		printf("Failed to open the bus. \n");
		exit(1);
	}
	// Get I2C device, MLX30393 I2C address is 0x0C(12)
	ioctl(file, I2C_SLAVE, 0x0C);

	// Write register command, AH = 0x00, AL = 0x5C, Hall plate spinning rate = DEFAULT, GAIN_SEL = 5(0x60, 0x00, 0x5C, 0x00)
	// Address register, (0x00 << 2)
	char config[4] = {0};
	config[0] = 0x60;
	config[1] = 0x00;
	config[2] = 0x5C;
	config[3] = 0x00;
	write(file, config, 4);

	// Read 1 Byte of data
	// status byte
	char data[7] = {0};
	read(file, data, 1);

	// Write register command, AH = 0x02, AL = 0xB4, RES for magnetic measurement = 0(0x60, 0x02, 0xB4, 0x08)
	// Address register, (0x02 << 2)
	config[0] = 0x60;
	config[1] = 0x02;
	config[2] = 0xB4;
	config[3] = 0x08;
	write(file, config, 4);

	// Read 1 Byte of data
	// status byte
	read(file, data, 1);

	// Start single meaurement mode, X, Y, Z-Axis enabled(0x3E)
	config[0] = 0x3E;
	write(file, config, 1);

	// Read 1 byte
	// status
	read(file, data, 1);
	sleep(1);

	// Send read measurement command, X, Y, Z-Axis enabled(0x4E)
	config[0] = 0x4E;
	write(file, config, 1);

	// Read 7 bytes of data
	// status, xMag msb, xMag lsb, yMag msb, yMag lsb, zMag msb, zMag lsb
	if(read(file, data, 7) != 7)
	{
		printf("Error : Input/Output error \n");
	}
	else
	{
		// Convert the data
		int xMag = (data[1]* 256 + data[2]);
		if(xMag > 32767)
		{
			xMag -= 65536;
		}

		int yMag = (data[3] * 256 + data[4]);
		if(yMag > 32767)
		{
			yMag -= 65536;
		}

		int zMag = (data[5] * 256 + data[6]);
		if(zMag > 32767)
		{
			zMag -= 65536;
		}

		// Output data to screen
		printf("Magnetic Field in X-Axis : %d \n", xMag);
		printf("Magnetic Field in Y-Axis : %d \n", yMag);
		printf("Magnetic Field in Z-Axis : %d \n", zMag);
	}
}
[/codesyntax]
Save this as MLX90393.c, I used the Cloud 9 IDE
First of all compile the c program.
$>gcc MLX90393.c -o MLX90393
Run the c program.
$>./MLX90393
Output
After running you should see something like this
Magnetic Field in X-Axis : -106
Magnetic Field in Y-Axis : -131
Magnetic Field in Z-Axis : -30
