
In this example we look at the BMP180 sensor with Arduino and Raspberry Pi examples
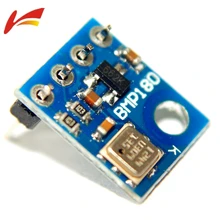
The BMP180 is the new digital barometric pressure sensor of Bosch Sensortec, with a very high performance, which enables applications in advanced mobile devices, such as smartphones, tablet PCs and sports devices. It follows the BMP085 and brings many improvements, like the smaller size and the expansion of digital interfaces.
The ultra-low power consumption down to 3 μA makes the BMP180 the leader in power saving for your mobile devices. BMP180 is also distinguished by its very stable behavior (performance) with regard to the independency of the supply voltage.
| Parameter | Technical data |
|---|---|
| Pressure range | 300 … 1100 hPa |
| RMS noise expressed in pressure | 0.06 hPa, typ. (ultra low power mode) 0.02 hPa, typ. (ultra high resolution mode) |
| RMS noise expressed in altitude | 0.5 m, typ. (ultra low power mode) 0.17 m, typ. (ultra high resolution mode) |
| Relative accuracy pressure VDD = 3.3 V |
950 … 1050 hPa/ ±0.12 hPa @ 25 °C/ ±1.0 m 700 … 900 hPa/ ±0.12 hPa 25 … 40 °C/ ±1.0 m |
| Absolute accuracy p = 300…1100hPa (Temperature = 0…+65°C, VDD = 3.3. V) |
Pressure: -4.0 … +2.0 hPa Temperature: ±1 °C, typ. |
| Average current consumption (1 Hz data refresh rate)
Peak current |
3 μA, typical (ultra-low power mode) 32 μA, typical (advanced mode)650 μA, typical |
| Stand-by current | 1.62 … 3.6 V |
| Supply voltage VDDIO | 1.62 … 3.6 V |
| Supply voltage VDD | 1.8 … 3.6 V |
| Operation temp. Range full accuracy” |
-40 … +85 °C 0 … +65 °C |
| Pressure conv. Time | 5 msec, typical (standard mode) |
| I²C date transfer rate | 3.4 MHz, max. |
Parts List
These are the parts for our Arduino and Raspberry Pi example
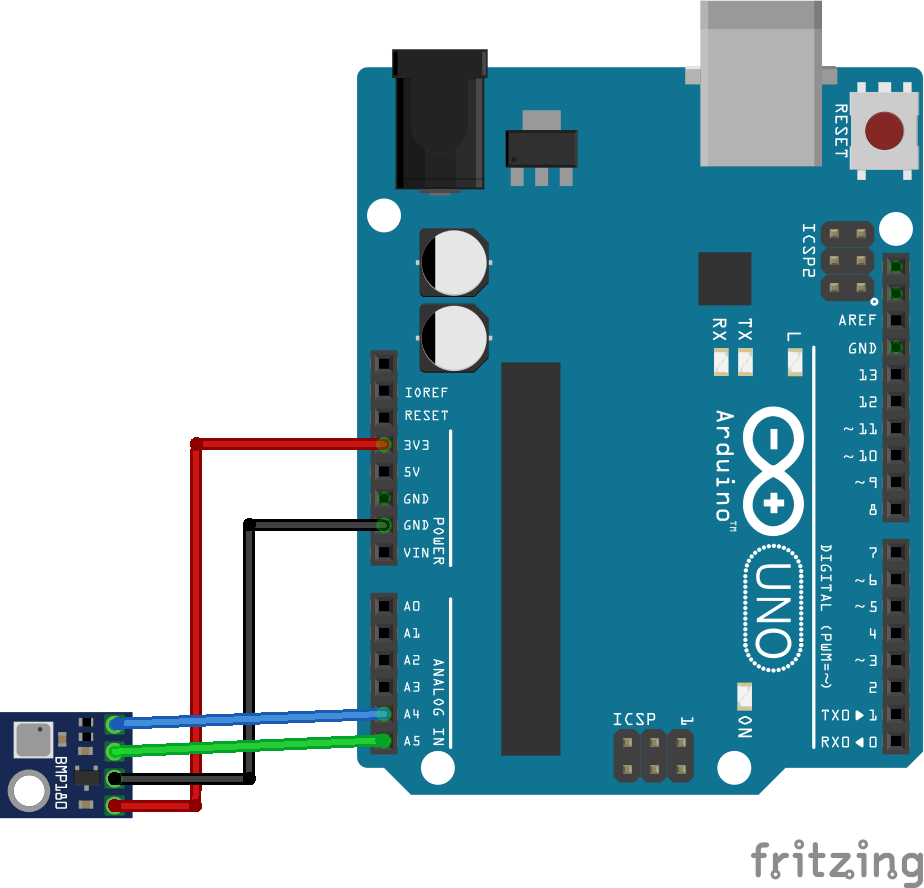
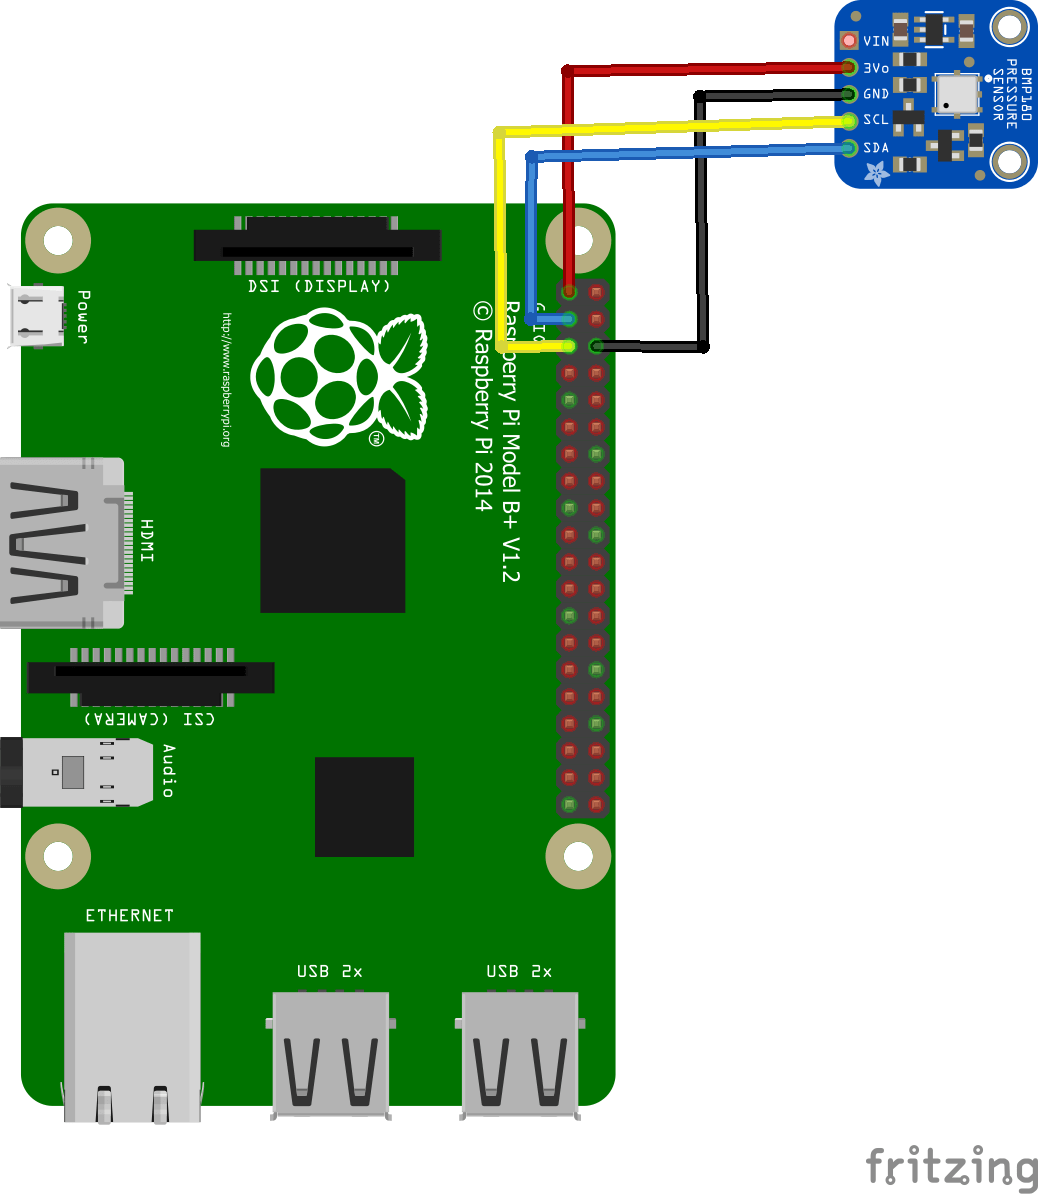
Schematics and connections
Both the arduino and Raspberry Pi boards are easy to connect to the BMP180 module
First the Arduino
Now for the Raspberry Pi example
Code example
Now for the code examples we have an Arduino example and 2 Raspberry Pi examples
Arduino example
This example used the adafruit libraries – https://github.com/adafruit/Adafruit-BMP085-Library
[codesyntax lang=”cpp”]
#include <Wire.h>
#include <Adafruit_BMP085.h>

// Connect VCC of the BMP180 sensor to 3.3V
// Connect GND to Ground
// Connect SCL to i2c clock  thats A5
// Connect SDA to i2c data  thats A4

Adafruit_BMP085 bmp;

void setup()
{
  Serial.begin(9600);
  if (!bmp.begin())
  {
	Serial.println("BMP180 sensor not found");
	while (1) {}
  }
}

void loop() {
    Serial.print("Temperature = ");
    Serial.print(bmp.readTemperature());
    Serial.println(" *C");

    Serial.print("Altitude = ");
    Serial.print(bmp.readAltitude(101500));
    Serial.println(" meters");

    Serial.println();
    delay(1000);
}
[/codesyntax]
Output
this was the reading from the serial monitor
Temperature = 22.90 *C
Altitude = 103.32 meters
To see how accurate this was I went to http://elevationmap.net and typed in my address, the stated elevation was 99m. Given that there was probably an additional couple of metres where the device was located in my house that’s not too bad accuracy wise
Raspberry Pi Example – python
Save the following as BMP180.py
[codesyntax lang=”python”]
import smbus
import time

bus = smbus.SMBus(1)

# BMP180 address, 0x77
data = bus.read_i2c_block_data(0x77, 0xAA, 22)

# Convert the data
AC1 = data[0] * 256 + data[1]
if AC1 > 32767 :
	AC1 -= 65535
AC2 = data[2] * 256 + data[3]
if AC2 > 32767 :
	AC2 -= 65535
AC3 = data[4] * 256 + data[5]
if AC3 > 32767 :
	AC3 -= 65535
AC4 = data[6] * 256 + data[7]
AC5 = data[8] * 256 + data[9]
AC6 = data[10] * 256 + data[11]
B1 = data[12] * 256 + data[13]
if B1 > 32767 :
	B1 -= 65535
B2 = data[14] * 256 + data[15]
if B2 > 32767 :
	B2 -= 65535
MB = data[16] * 256 + data[17]
if MB > 32767 :
	MB -= 65535
MC = data[18] * 256 + data[19]
if MC > 32767 :
	MC -= 65535
MD = data[20] * 256 + data[21]
if MD > 32767 :
	MD -= 65535

time.sleep(0.5)

bus.write_byte_data(0x77, 0xF4, 0x2E)
time.sleep(0.5)
data = bus.read_i2c_block_data(0x77, 0xF6, 2)

# Convert the data
temp = data[0] * 256 + data[1]

bus.write_byte_data(0x77, 0xF4, 0x74)

time.sleep(0.5)

data = bus.read_i2c_block_data(0x77, 0xF6, 3)

# Convert the data
pres = ((data[0] * 65536) + (data[1] * 256) + data[2]) / 128

# Callibration for Temperature
X1 = (temp - AC6) * AC5 / 32768.0
X2 = (MC * 2048.0) / (X1 + MD)
B5 = X1 + X2
cTemp = ((B5 + 8.0) / 16.0) / 10.0
fTemp = cTemp * 1.8 + 32

# Calibration for Pressure
B6 = B5 - 4000
X1 = (B2 * (B6 * B6 / 4096.0)) / 2048.0
X2 = AC2 * B6 / 2048.0
X3 = X1 + X2
B3 = (((AC1 * 4 + X3) * 2) + 2) / 4.0
X1 = AC3 * B6 / 8192.0
X2 = (B1 * (B6 * B6 / 2048.0)) / 65536.0
X3 = ((X1 + X2) + 2) / 4.0
B4 = AC4 * (X3 + 32768) / 32768.0
B7 = ((pres - B3) * (25000.0))
pressure = 0.0
if B7 < 2147483648L :
	pressure = (B7 * 2) / B4
else :
	pressure = (B7 / B4) * 2
X1 = (pressure / 256.0) * (pressure / 256.0)
X1 = (X1 * 3038.0) / 65536.0
X2 = ((-7357) * pressure) / 65536.0
pressure = (pressure + (X1 + X2 + 3791) / 16.0) / 100

# Calculate Altitude
altitude = 44330 * (1 - ((pressure / 1013.25) ** 0.1903))

# Output data to screen
print "Altitude : %.2f m" %altitude
print "Pressure : %.2f hPa " %pressure
print "Temperature in Celsius : %.2f C" %cTemp
print "Temperature in Fahrenheit : %.2f F" %fTemp
[/codesyntax]
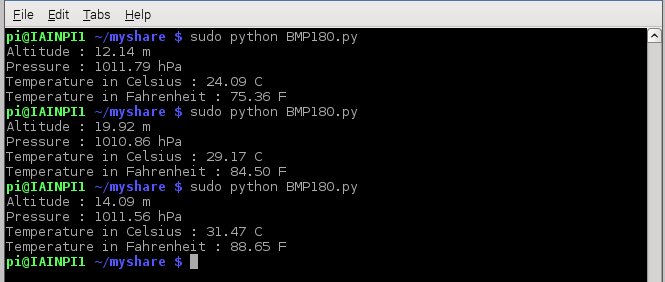
Run the following from the command line by typing in – sudo python BMP180.py
Raspberry Pi Example – java
This time we explore the world of Java on the Raspberry Pi
First you need to install PI4j – http://pi4j.com/install.html . I’ll sum it up as its easy to install from a terminal
The simplest method to install Pi4J on your RaspberryPi is to execute the following command directly on your RaspberryPi.
curl -s get.pi4j.com | sudo bash
Now for the java code – this is courtesy of a controleverything example
[codesyntax lang=”java”]
// Distributed with a free-will license.
// Use it any way you want, profit or free, provided it fits in the licenses of its associated works.
// BMP180
// This code is designed to work with the BMP180_I2CS I2C Mini Module available from ControlEverything.com.
// https://www.controleverything.com/content/Pressure?sku=BMP180_I2CS#tabs-0-product_tabset-2

import com.pi4j.io.i2c.I2CBus;
import com.pi4j.io.i2c.I2CDevice;
import com.pi4j.io.i2c.I2CFactory;
import java.io.IOException;
import java.lang.Math;

public class BMP180
{
	public static void main(String args[]) throws Exception
	{
		// Create I2C bus
		I2CBus bus = I2CFactory.getInstance(I2CBus.BUS_1);
		// Get I2C device, BMP180 I2C address is 0x77(119)
		I2CDevice device = bus.getDevice(0x77);

		// Calibration Cofficients stored in EEPROM of the device
		// Read 22 bytes of data from address 0xAA(170)
		byte[] data = new byte[22];
		device.read(0xAA, data, 0, 22);

		// Convert the data
		int AC1 = data[0] * 256 + data[1];
		int AC2 = data[2] * 256 + data[3];
		int AC3 = data[4] * 256 + data[5];
		int AC4 = ((data[6] & 0xFF) * 256) + (data[7] & 0xFF);
		int AC5 = ((data[8] & 0xFF) * 256) + (data[9] & 0xFF);
		int AC6 = ((data[10] & 0xFF) * 256) + (data[11] & 0xFF);
		int B1 = data[12] * 256 + data[13];
		int B2 = data[14] * 256 + data[15];
		int MB = data[16] * 256 + data[17];
		int MC = data[18] * 256 + data[19];
		int MD = data[20] * 256 + data[21];
		Thread.sleep(500);

		// Select measurement control register
		// Enable temperature measurement
		device.write(0xF4, (byte)0x2E);
		Thread.sleep(100);

		// Read 2 bytes of data from address 0xF6(246)
		// temp msb, temp lsb
		device.read(0xF6, data, 0, 2);

		// Convert the data
		int temp = ((data[0] & 0xFF) * 256 + (data[1] & 0xFF));

		// Select measurement control register
		// Enable pressure measurement, OSS = 1
		device.write(0xF4, (byte)0x74);
		Thread.sleep(100);

		// Read 3 bytes of data from address 0xF6(246)
		// pres msb1, pres msb, pres lsb
		device.read(0xF6, data, 0, 3);

		// Convert the data
		double pres = (((data[0] & 0xFF) * 65536) + ((data[1] & 0xFF) * 256) + (data[2] & 0xFF)) / 128;

		// Callibration for Temperature
		double X1 = (temp - AC6) * AC5 / 32768.0;
		double X2 = (MC * 2048.0) / (X1 + MD);
		double B5 = X1 + X2;
		double cTemp = ((B5 + 8.0) / 16.0) / 10.0;
		double fTemp = cTemp * 1.8 + 32;

		// Calibration for Pressure
		double B6 = B5 - 4000;
		X1 = (B2 * (B6 * B6 / 4096.0)) / 2048.0;
		X2 = AC2 * B6 / 2048.0;
		double X3 = X1 + X2;
		double B3 = (((AC1 * 4 + X3) * 2) + 2) / 4.0;
		X1 = AC3 * B6 / 8192.0;
		X2 = (B1 * (B6 * B6 / 2048.0)) / 65536.0;
		X3 = ((X1 + X2) + 2) / 4.0;
		double B4 = AC4 * (X3 + 32768) / 32768.0;
		double B7 = ((pres - B3) * (25000.0));
		double pressure = 0.0;
		if(B7 < 2147483648L)
		{
			pressure = (B7 * 2) / B4;
		}
		else
		{
			pressure = (B7 / B4) * 2;
		}
		X1 = (pressure / 256.0) * (pressure / 256.0);
		X1 = (X1 * 3038.0) / 65536.0;
		X2 = ((-7357) * pressure) / 65536.0;
		pressure = (pressure + (X1 + X2 + 3791) / 16.0) / 100;

		// Calculate Altitude
		double altitude = 44330 * (1 - Math.pow((pressure / 1013.25), 0.1903));

		// Output data to screen
		System.out.printf("Altitude : %.2f m %n", altitude);
		System.out.printf("Pressure : %.2f hPa %n", pressure);
		System.out.printf("Temperature in Celsius : %.2f C %n", cTemp);
		System.out.printf("Temperature in Fahrenheit : %.2f F %n", fTemp);
	}
}
[/codesyntax]
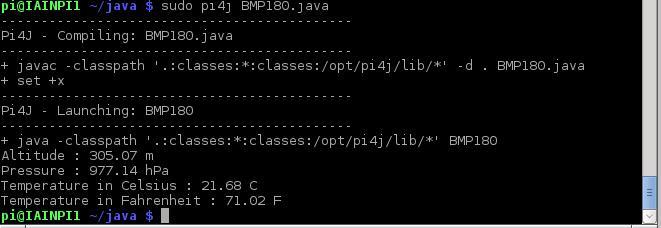
Now you have to compile and run the program like this
$> sudo pi4j BMP180.java
You should see the following
Links
